3D Rad - Free 3D game maker - Forum

This forum is now archived!

This forum is locked, and is a read-only version. A new community-ran forum can be found at classdev.net

News:

The 3DRad community can be found at classdev.net.

Pages: [1] 2 3

Author Topic: Terrain making (full tutorial / step by step) L3DT->T.ED->3d Rad  (Read 42271 times)

« on: February 28, 2009, 04:11:51 PM »


THIS IS ALMOST OUTDATED, AND WILL BE SIMPIFIED / UPDATED


From L3DT or Freeworld to 3DRAD via T.ED (full tutorial)

1. Get software(s):

1.1 - Download/buy L3DT  http://www.bundysoft.com/L3DT/downloads/ (I use the free version)
1.2 - Download/buy T.ED  http://www.d-grafix.com/?page=ted#DOWN   (I use the registered version)

     and you could get Freeworld here (i'm not covering FW but basics are the same) : http://www.freeworld3d.org/downloads.phpl

2. Make a terrain in L3DT and export :

Takes 4 minutes to generate a nice terrain in L3DT, you can ofc edit before you export.

2.01 - Start L3DT
2.02 - Ctrl+N  (Design/inflate) click NExt
2.03 - Use defaults 1024x1024, might wanna check edgewrapping if you plan to tile. (click Next)
2.04 - HF/DM ratio : just leave, Click Next
2.05 - Designmap parameters: play around, choose a climate (Spring Greenworld is nice), click Next
2.06 - Calculate queue : Check all except Water map and Light Map.
2.07 - Texture Settings : Uncheck Use Lightmap. click ok

... enjoy the 2 minute color show...

2.08 - click the "3-D" button at the top right to preview. Close when satisfied.
2.09 - Click Texture Map tab, then Ctrl+E, click browse and save your JPG somewhere. Click OK
2.10 - Click Heightfield tab, then Ctrl+E, Choose fileformat BMP, click browse and save your BMP somewhere. CLick ok

Leave L3DT

3. Start T.ED (I know the menus GUI is a real pain!!) -- OR Use GMAX

3.01 - File->New
3.02 - choose Lo-res 32x32, and then Quads 5x5
3.03 - File -> Import Terrain, select Heightmap, select 8-bit Greyscale
3.04 - Select your saved BMP heightmap from L3DT
3.05 - Just hit Enter on both dialogs asking for 100 and 0
3.06 - Navigate so you get on top of the terrain. (for better overview) :)
3.07 - File -> Import Terrain, select colormap
3.08 - Select your saved JPG texture from L3DT.
3.09 - File -> Export Terrain

Uncheck EPR and BITMAP if checked..


Check :

MESH
+X with SuperTexture
Truncate X
Base Up X
.
.
+Corner offset
Supertex Resolution : 1024
S.Tex File Format : JPG

NOTE 1: You can set dds texture here, but T.ED will then export BMP which you need to convert. (using a converter or NVIDEA adobe plugin)
NOTE 2: You can convert the JPG's to DDS as well if you want after export, 3D-RAD seems to read mime info not file-extension so you can have dds format named .jpg


3.10 - Click Export
3.11 - Save to a folder of your choosing using the name 000_mesh.x

... wait 2 minutes orso...

3.12 - Click OK on the dialog
3.13 - Supertexture renderer is starting (dos-like window), just hit enter

.... wait 2 minutes orso...

3.14 - Hit y then enter on next dialog...


Leave T.ED

4. Open Windows Explorer
  -- or just use RadImp

4.01 - Navigate to your folder where you saved the export from 3.11
4.02 - Rename folder to whatever you want to call your terrain (suggestion : 2500x2500_terrain)
4.03 - Copy folder to C:\3D Rad\3DRad_res\objects\SkinMesh\data\

    Now you have a folder called C:\3D Rad\3DRad_res\objects\SkinMesh\data\2500x2500_terrain

4.04 - Make a new folder called the same name in C:\3D Rad\3DRad_res\objects\RigidBody\data\

    Now you have a folder called C:\3D Rad\3DRad_res\objects\RigiBbody\data\2500x2500_terrain

4.05 - Copy the 000_mesh.x in here and rename it to rigidBody_.x, make a copy of that again and rename it to rigidBody_mesh.x
4.06 - Navigate to C:\3D Rad\3DRad_res\objects\RigidBody\data\index\
4.07 - copy Plane1km.jpg and rename the copy to 2500x2500_terrain.jpg
4.08 - copy 2500x2500_terrain.jpg to C:\3D Rad\3DRad_res\objects\SkinMesh\data\index\

5. Open 3D RAD

1. - Hit Ctrl+N
2. - Hit ctrl+A , choose RigidBody
3. - change the rigidbody, choose 2500x2500_terrain, click ok
4. - Click No, 3D rad will now create .ply .pol .xsm files.
5. - Hit Ctrl+A , choose SkinMesh
6. - change the skinmesh, choose 2500x2500_terrain, uncheck No shadows, click ok

VOILA...

Add a sunlight, car, skybox, g-force, camchase and drive around in your 2.5km x 2,5 km terrain :)
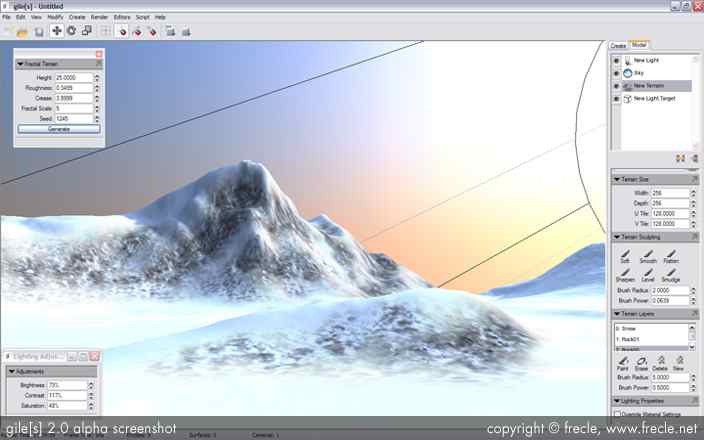
« Last Edit: August 08, 2009, 09:23:10 AM by shadmar »
« Reply #1 on: March 01, 2009, 04:49:11 AM »
Accurate and useful, thanx shadmar  :)
« Reply #2 on: March 04, 2009, 10:26:29 AM »
Added 2 notes to 3.09

NOTE 1: You can set dds texture here, but T.ED will then export BMP which you need to convert (using a converter or NVIDEA adobe plugin).
NOTE 2: You can convert the JPG's to DDS as well if you want after export, 3D-RAD seems to read mime info not file-extension so you can have dds format named .jpg
« Reply #3 on: March 09, 2009, 11:11:06 AM »
hello. Who knows, what of paid software products, (such as in a case SKYBOXES VUE? It is possible easy by means of GUI VUE to do and export landscapes without resorting to any convertings and so on)?
« Reply #4 on: March 09, 2009, 12:33:46 PM »
From VUE 7 page http://www.e-onsoftware.com/products/vue/vue_7_infinite/?page=import#collada
Quote
3DS: 3D Studio� object file format.
C4D: Cinema 4D� object file format.
COB: TrueSpace� object file format.
DXF: AutoCad� object file format.
LWO, MOT, LWS: LightWave� file formats.
OBJ: Wavefront� object file format.
SHD: Shade� object file format.


Note: entire scenes can be exported as 3DS or LightWave LWS files only. Object animation information (motion, scale and orientation) can be exported as 3DS or LightWave MOT/LWS files.

Objects can be marked as not being exportable to prevent third party exports. EcoSystem materials cannot be exported.

So no direct export to .X.
I don't own VUE but Truespace (which is free) can export to .X, and Sketchup can import 3DS and export to 3d-rad via plugin.
I'm not sure how textures is done in all this.
« Reply #5 on: March 10, 2009, 03:43:43 AM »
If you want to use the software to only export skyboxes, you don't need .x file support. All you need is the ability to export individual image files for each view (6 in total, _nx, _ny, etc).

You can find details on how to create these image files in the SkyBox help file.
« Reply #6 on: April 03, 2009, 01:10:37 PM »
Hey

If you want a totally free alternative, you can use Gmax to do the export to RAD.

In short do this :

0. Start L3DT
1. Make the terrain in L3DT
2. Export the HM and texture.
3. Leave L3DT

1. Start Gmax (make sure you install the plugins as described in Mic's post)
2. Make sure you set units to meters in Gmax
3. Create a plane, size=1024x1024 or 2048x2048 depending on your HM resolution, segments should be 0.1 of size (1024, gives 102 segments)
4. Use displace modifier, load bitmap, choose the heightmap exported from L3DT
5. Set strength 0.1 of total plane size (1024 gives then 102 in strength)
6. Go to mat editor, click new, standard, click +Maps go to Diffuse, Click None, select bitmap, select texture
7. Click the small blue-white cube to view the texture in the Perspective view.
8. Export flightSim Aircraft Object *.MDL, enter a name ( 000_mesh ), When middleman opens, click options, check Save X file, No Compile

Copy to skinmesh / rigidbody etc.. as described in the top post...

Anyway this way you can export any heightmap to .X and apply texture to it and get it into RAD. (I can write this very detailed if there is interest)

I Guess this will work in 3DS Max too since gmax is a downscaled old version of max. (from what I've read)

« Last Edit: April 03, 2009, 01:22:34 PM by shadmar »
« Reply #7 on: April 04, 2009, 02:25:11 AM »
giles can create excellent lightmapped and textured terrains... for the low price of... wait?... giles i now FREE!!!


all this is realtime
« Reply #8 on: April 04, 2009, 01:46:29 PM »
it's free? could you post a link of the website/download page? i'm having trouble finding it

Currently using 7.22
« Reply #9 on: April 04, 2009, 06:03:25 PM »
it's free? could you post a link of the website/download page? i'm having trouble finding it
download it here
« Reply #10 on: May 11, 2009, 07:37:46 PM »
Great stuff!! Thanks for the heads-up.
« Reply #11 on: May 14, 2009, 07:39:39 AM »
Giles is free, but if you can do that WOW. I can't. It require to have the right texture and I think it come with 0 textures.
« Reply #12 on: June 11, 2009, 02:54:45 PM »
Just found out that L3DT should include full .OBJ and .MTL  exportation with an upcoming release...how cool is that  eh, eh?
« Reply #13 on: July 27, 2009, 10:40:03 AM »
L3DT 2.7 build 18 or later now supports 3ds export with texture, which means you can load it in SU and import to RAD. (faces are inverted).
« Reply #14 on: July 30, 2009, 03:17:24 AM »
Here's how I got rigidbody "terrain" working: (with Max2010 + Panda .X export)

In MAX2010
1. Make terrain geometry
2. Add texture (standard map, bitmap texture)
3. Export .X (default settings, except removed (x) from animation export)
(must have more than 1 object in the scene..just 1 plane doesnt seem to showup in 3drad(?)..)

In 3DRad
1. Object / Install custom rigidbody (polygons) CTRL+3
2. Give name to your rigidbody
3. Go to the folder of your newly created rigidbody
4. Delete files from ^ that folder
5. Copy your.X and texture.jpg to this folder
6. Rename your.X > "rigidBody_mesh.x"
7. Make copy of "rigidBody_mesh.x" and rename it to "rigidBody_.x"
8. Done, now bring it to editor:
9. Object / Add...rigidbody (select your rigidbody)
9. Click NO when it asks something..
10. test with car and gravity..


*attached testcity, copy to rigidbodies and add index image... (city made with free max plugin Greeble)
« Last Edit: July 30, 2009, 03:19:54 AM by mgear »
http://3dradder.blogspot.com/ <- Stuff 4 3DRad   | *Donate now: Post-prosessing shaders | External Script editor mEH*
Pages: [1] 2 3