3D Rad - Free 3D game maker - Forum

This forum is now archived!

This forum is locked, and is a read-only version. A new community-ran forum can be found at classdev.net

News:

The 3DRad community can be found at classdev.net.

Pages: [1] 2 3

Author Topic: how to apply Bump mapping/normal mapping  (Read 5800 times)

« on: September 08, 2009, 12:59:28 PM »
Hi,

As I am still working on my 3d town I am making good progress. Some people from the community really helped me out giving me some idea's/tips about vegetation.

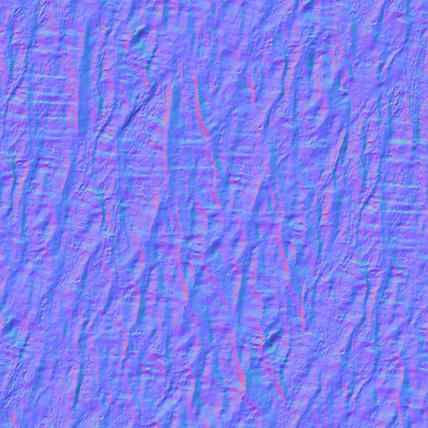
I actually have some questions about bump mapping now. I would like to bring my town a bit more to life by using normal/bump mapping. Now I kinda know how bump/normal mapping works, I am just not sure how to apply it.
From what I understand is that you usually apply that kind of texturing in your 3d modeler.
Unfortunately Sketchup does not support normal mapping.
Does anyone have any idea's/tips for me to make this work?
I would like to know how to apply normal mapping to my buildings and have it shown in 3d rad.

Thanks in advance

« Reply #1 on: September 08, 2009, 01:22:55 PM »
Quote
If your artwork requires a normal-map, you must include it as an image file named '000_nm.ext' where '.ext' can be one of the following: .bmp, .jpg, .dds, .png, .tga.

To enable normal mapping for the SkinMesh, open the property dialog for it and select a 'bumpy' shader.

http://www.3drad.com/importing.php#3
Crashing Boxes - winner of the 3d games category at the 5th Uruguayan video game contest
get a copy for your iPad/iPhone!
« Reply #2 on: September 08, 2009, 01:29:02 PM »
that's it eh? Thanks!

I'll give it a shot.
« Reply #3 on: September 08, 2009, 05:03:53 PM »
I just tried applying bump maps to my skinmesh but it does not look as great. There must be something I am doing wrong.

I used sketchup to build a simple wall and exported it to 3drad. I used a texture from a texture CD I have purchased a while back. This cd also provides bump maps.
Once the skinmesh was created, I copied the bump file to the skinmesh folder and renamed the bump file to 000_nm.ext.

When I applied the bump shader on my skinmesh, the result was kinda strange:


On the left, without the shader, on the right with the bump shader enabled.

« Reply #4 on: September 08, 2009, 05:35:05 PM »
looking at the shadows it dosnt match the perspective, I think...
looks like reversed, and so the bumpmap. that could be the cause that make you feel something is not working right.

I dont know what to say, try invert the colors for the bumpmap (in case its a black and white one) or flip the image.

also, ive realized this kind of 'colored' normal maps:

give me more desirable results than the black and white, which i used to think were the ones.

after all, to be honest... Im total ignorant about the subject  ;D
Crashing Boxes - winner of the 3d games category at the 5th Uruguayan video game contest
get a copy for your iPad/iPhone!
« Reply #5 on: September 08, 2009, 05:51:08 PM »
@ loop:

I'll try that. The bump I've used is a b/w one.

@ Mike

I named it 000_nm.ext just like the tutorial described.
« Reply #6 on: September 08, 2009, 06:07:00 PM »
thanks... I'll try that.

I am assuming I should rename it to 000_nm.jpg in case I am using a jpeg?
« Reply #7 on: September 08, 2009, 06:09:47 PM »
you are correct!  :D
Crashing Boxes - winner of the 3d games category at the 5th Uruguayan video game contest
get a copy for your iPad/iPhone!
« Reply #8 on: September 14, 2009, 12:35:40 PM »
Thanks guys. Unfortunately bump mapping still doesn't work that well for me but that is for later concern. I am just trying to play around with some shaders now in 3Drad just to see what kind of effects I can reach for my project.

The 3d town I am creating is an actual existing part of a town (the way it was in the 1970's). What I am trying to do is to give all my objects in the game an old, aged look.

I put some screenshots on Flickr! to give you guys an idea and peak of what I am doing:

http://www.flickr.com/photos/26538241@N07 (the black/white pic is not part of the game)

More pics will follow.


What I am trying to figure out now is how to get this old, aged look in 3Drad.
Does anybody know if I can apply some sort of colour filter (to reduce the colour contrast, making it more black and white'ish?)


INfinit-3D

« Reply #9 on: September 14, 2009, 02:02:00 PM »
 ???
« Last Edit: March 10, 2012, 09:54:26 AM by Jimmu »
« Reply #10 on: September 14, 2009, 02:18:54 PM »
thanks INfinit-3D!

I will post some screenshots taken from 3d rad later today..

Got some screenshots yourself?
« Reply #11 on: September 15, 2009, 09:44:39 AM »
Ok I think I know what the Bump mapping issue caused I was having...


When I export a Skinmesh from Sketchup to RAD, an 00_nm.dds file gets automatically created
and placed in the Skinmesh folder. What I would do is I would manually copy my bump file (a jpeg) to the same Skinmesh folder and call it 00_nm.jpg (which basically means that I have a jpg and dds file in the same folder).

When I apply the bump shader in RAD, it seems to pick the auto created dds file. When I replace that DDS file with my own bump file I get a different effect.
Still not a bump mapping result but I am getting there it seems...
« Reply #12 on: September 15, 2009, 10:21:55 AM »
Please post the model, texture and bumptexture, and I will test it for you.
« Reply #13 on: September 15, 2009, 11:10:08 AM »
@ shadmar :

Thanks, I appreciate that.

I will post the model + textures tonight... (I'm @ work right now).

Thanks again
« Reply #14 on: September 15, 2009, 04:34:55 PM »
Hi shadmar,

Here's my wall test I was trying to apply the bump shader on to.

Just extract the all the files (except for the WallTest.jpg) to a folder in your main Skinmesh directory called WallTest. Then, extract the WallTest.jpg to your index folder of your main Skinmesh directory.
(I don't think I had to tell you this actually)

When I apply the bump map on this model in RAD, nothing happens rather than the fuzzy texture effect I had last time I tried this.
I must be doing something wrong I guess.

Thanks in advance
Pages: [1] 2 3